Table of Contents

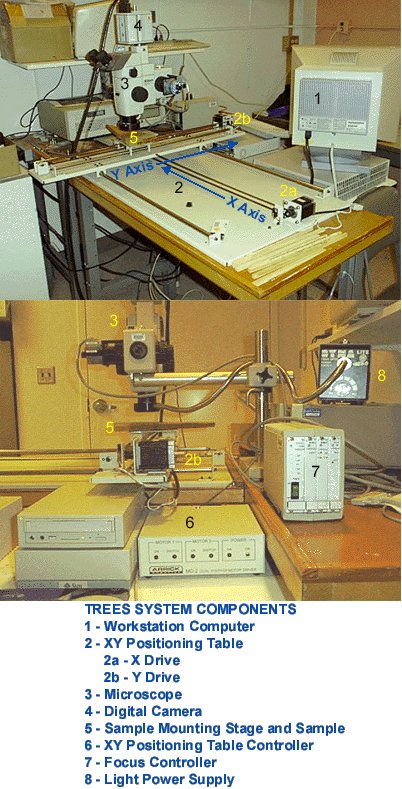
TREES SYSTEM
Step 1 - Sample
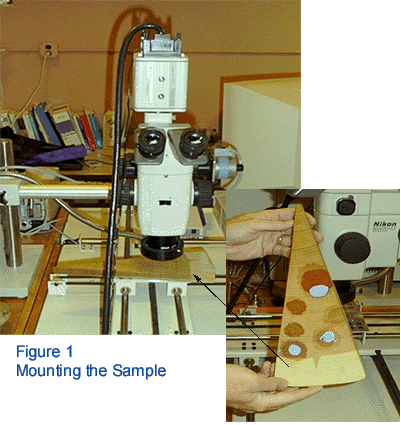
Obtain a sample and mount it to the Sample Mounting Stage as shown
in Figure 1.
- The sample should be sanded flat on both sides.
- The sample thickness should be 4 cm. (1 inch.), or less.
- The sample should be mounted to the stage in a manner which prevents
it from moving during image acquisition. Application of putty
as shown in Figure 1 has proven effective in securing the sample.
- The sample should be mounted as level as possible on the mounting
stage.
- The sample should be mounted to provide for image acquisition
of vertical rings along the X axis (the long axis - see System
Components above) and to prevent the possibility of collision
with objects near the XY Positioning table.
- Cracks, wedges, and sap ducts along the path of image acquisition
should be avoided.
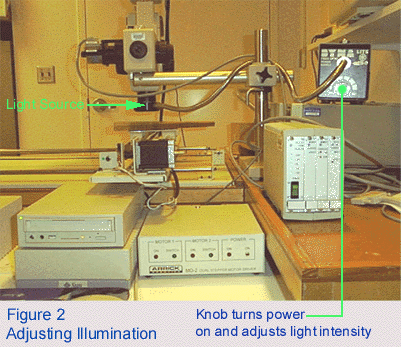
Step 2 - Turn on Sample Illumination
Turn-on and adjust sample illumination level by turning knob on
lighting power supply as shown in Figure 1.
- Do NOT turn on power to the Motor Controller or Focus Controller at
this time.
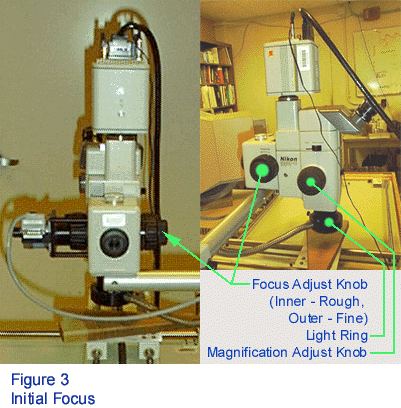
Step 3 - Adjust Magnification, Focus, and Illumination Level
- Using the magnification adjust knob (see Figure 2), set magnification
to its lowest setting (1.1x). Do NOT change this setting while performing image acquisition.
- Using the manual focus adjust knob while viewing the sample through
the microscope binoculars, adjust the focus to its best setting
for your eyesight. The larger (inside) ring performs rough focusing
and the smaller (outside) ring performs fine focusing.
- Re-adjust the illumination level as required. (see above)
- IMPORTANT: It is important that the power to the automatic focus controller
is turned OFF during manual focus adjustment. Damage to the focus controller
could result otherwise.
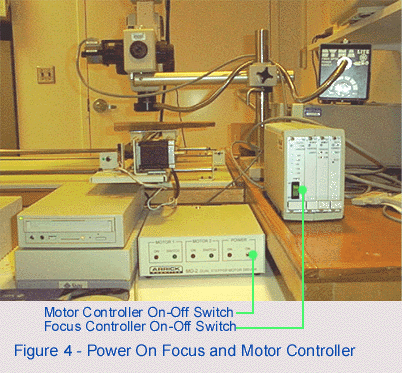
Step 4 - Turn on XY Positioning Table Motor Controller and Automatic
Focus Controller Power
Prior to acquiring images you must turn the power on to the XY
Positioning Table Motor Controller and Automatic Focus Controller
(see Figure 4).
- Do NOT make manual adjustments using the manual focus knob after turning
on the focus controller.
- You may make manual adjustments to the focus using the electronic
control knob (not shown).
Mechanical set-up is complete after performing step 4. Please
familiarize yourself with the components of the Main Screen in
the next section.
Next Section - Main Screen Overview
Previous Section - Overview
Last Updated: May 1999
University of Arizona
Questions and Comments: trees@ece.arizona.edu
Digital Image Analysis Laboratory and
Laboratory for Tree Ring Research © 1999